Polski

Guides

Step by step, with screenshots from the app. Numbered orange frames show where to tap or click.

Connect the phone to the PC server

The server on your Windows PC indexes the photo library, makes thumbnails and 720p videos and has all the tools. The phone connects to it over your home Wi-Fi.

1PC: run the server and choose the photo folder

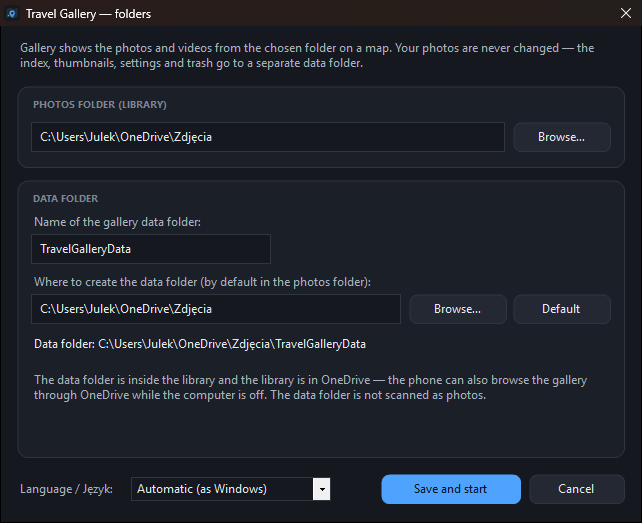
Download TravelGallery.exe from the Download section and run it (if Windows SmartScreen warns about an unknown app: “More info” → “Run anyway”). On the first start choose the folder with your photos. The data folder (index, thumbnails, trash) is created next to them — your photos are never modified.

  1. Photos folder (library)
  2. Save and start
PC: run the server and choose the photo folder 1 2

2PC: turn on network access

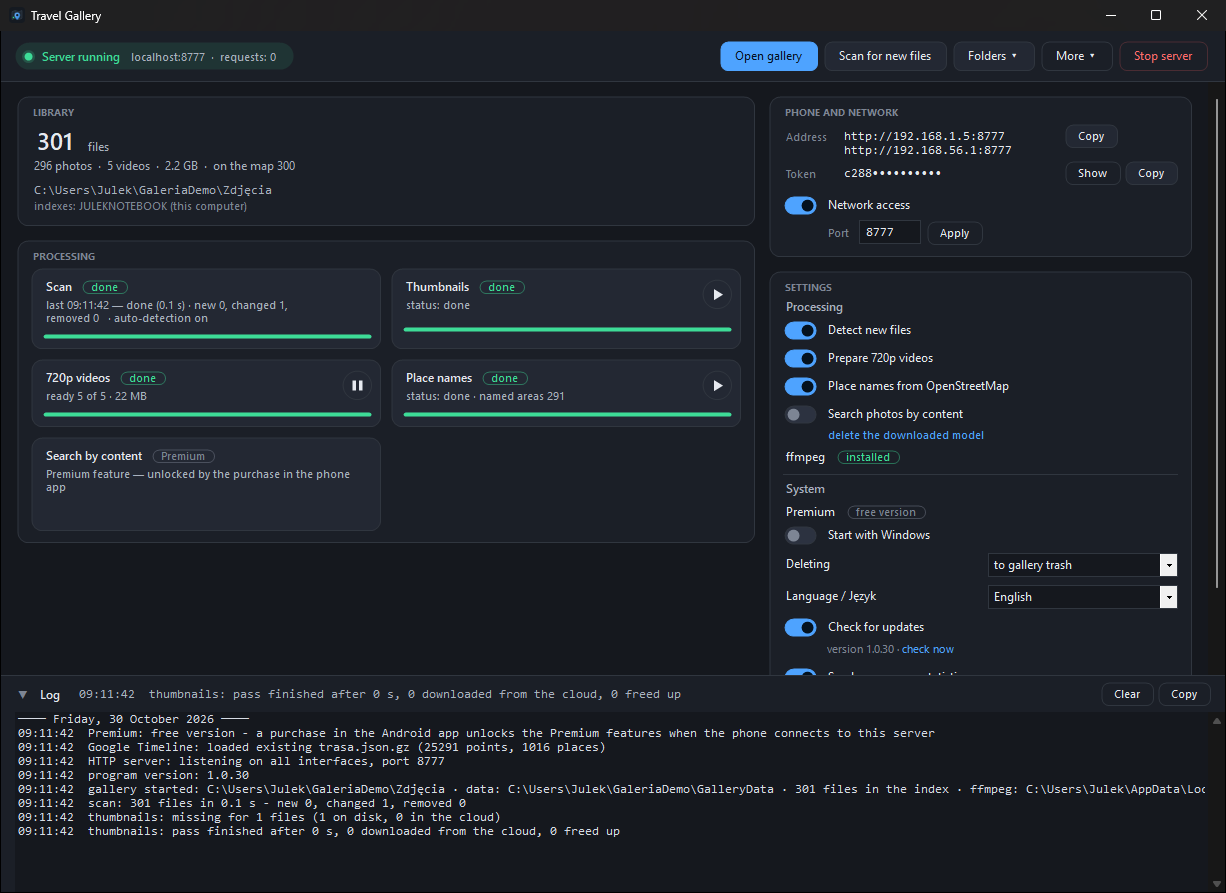
In the server window, in “Phone and network”, turn on Network access (Windows may ask for permission to open the port in the firewall). The window then shows the address for the phone and the token. “Show” displays the whole token. Keep the server running — it can also start with Windows.

  1. Network access
  2. Address for the phone (the first one, 192.168…)
  3. Token — “Show” displays all of it
PC: turn on network access 1 2 3

3Phone: open the settings

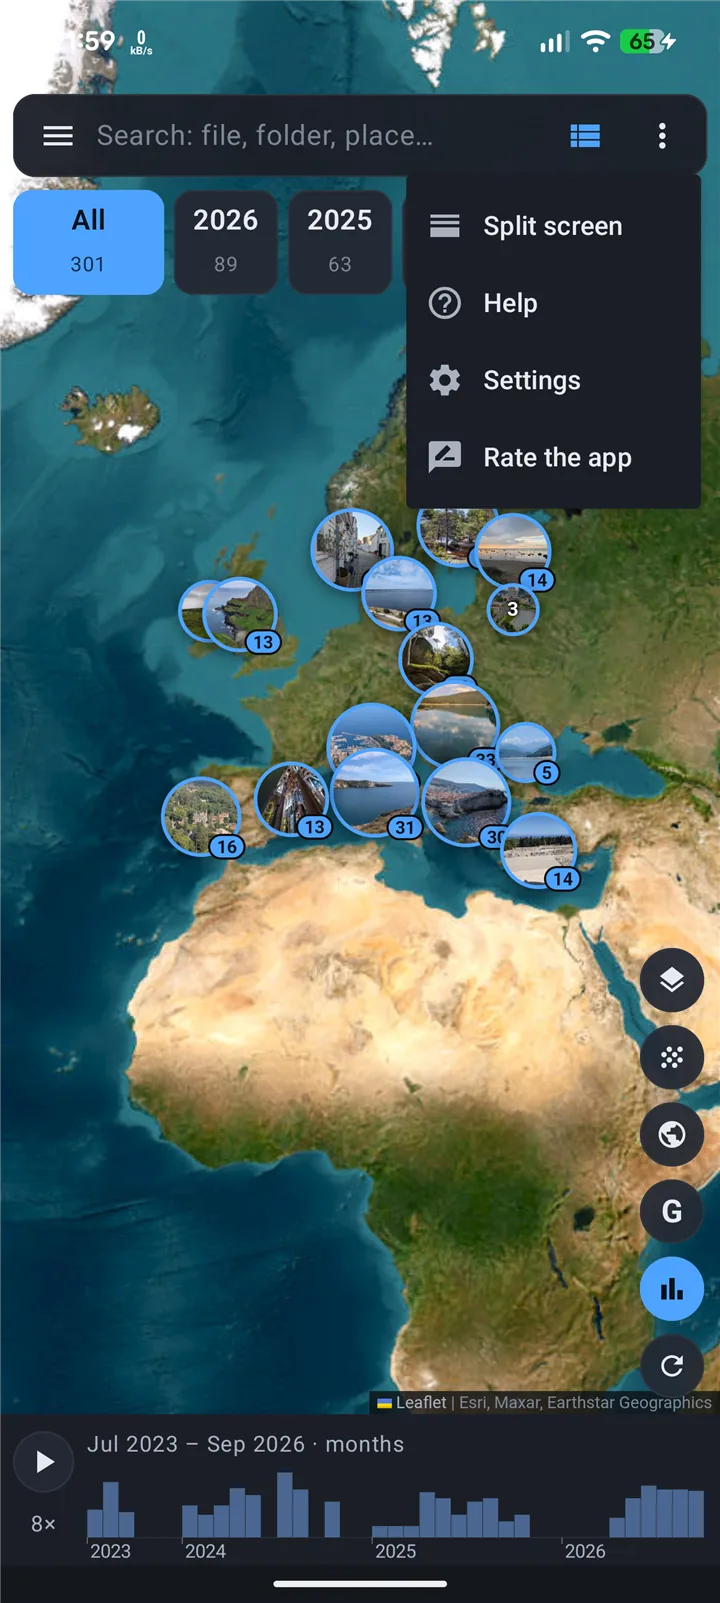
In the Travel Gallery app tap ⋮ in the top bar and choose Settings.

  1. Menu ⋮
  2. Settings
Phone: open the settings 1 2

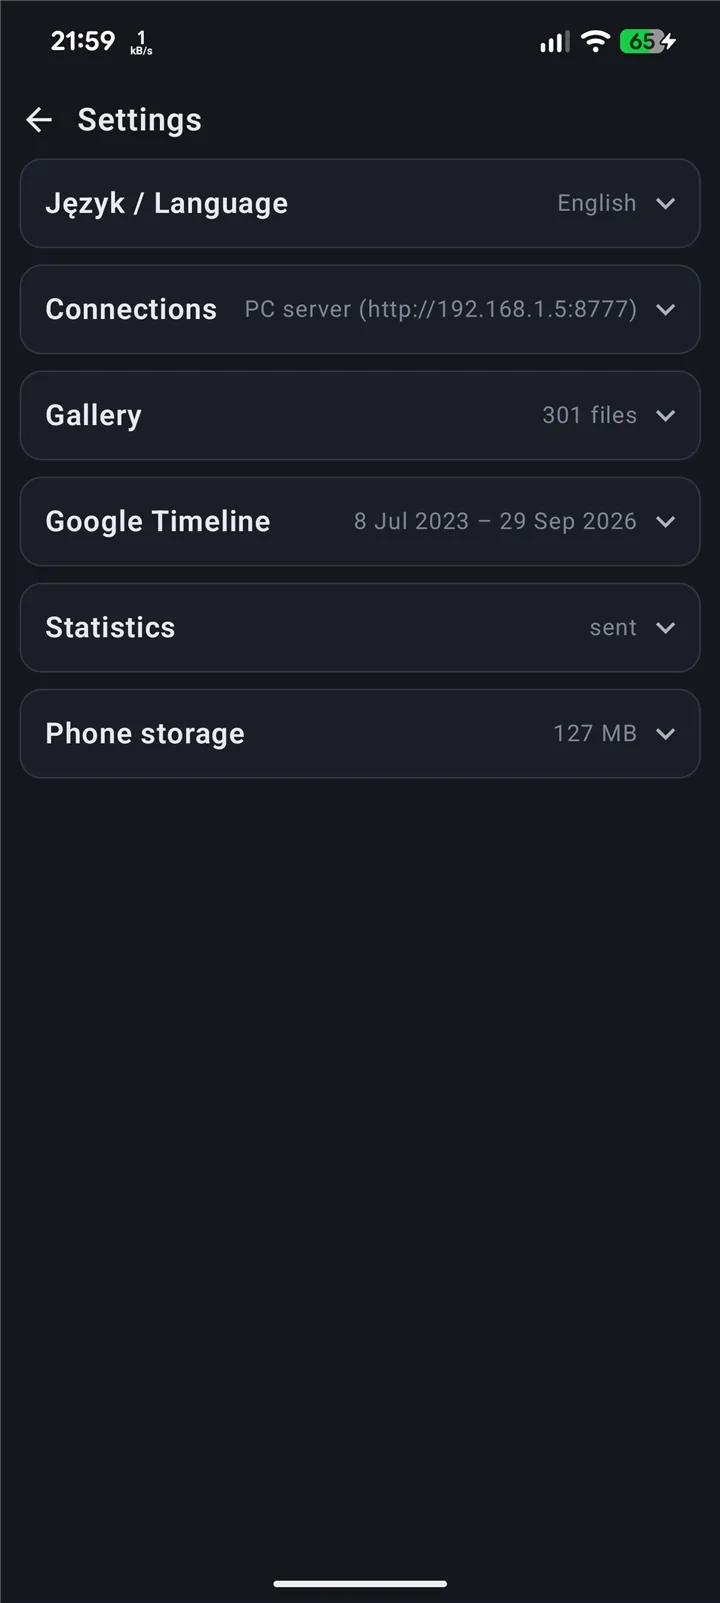
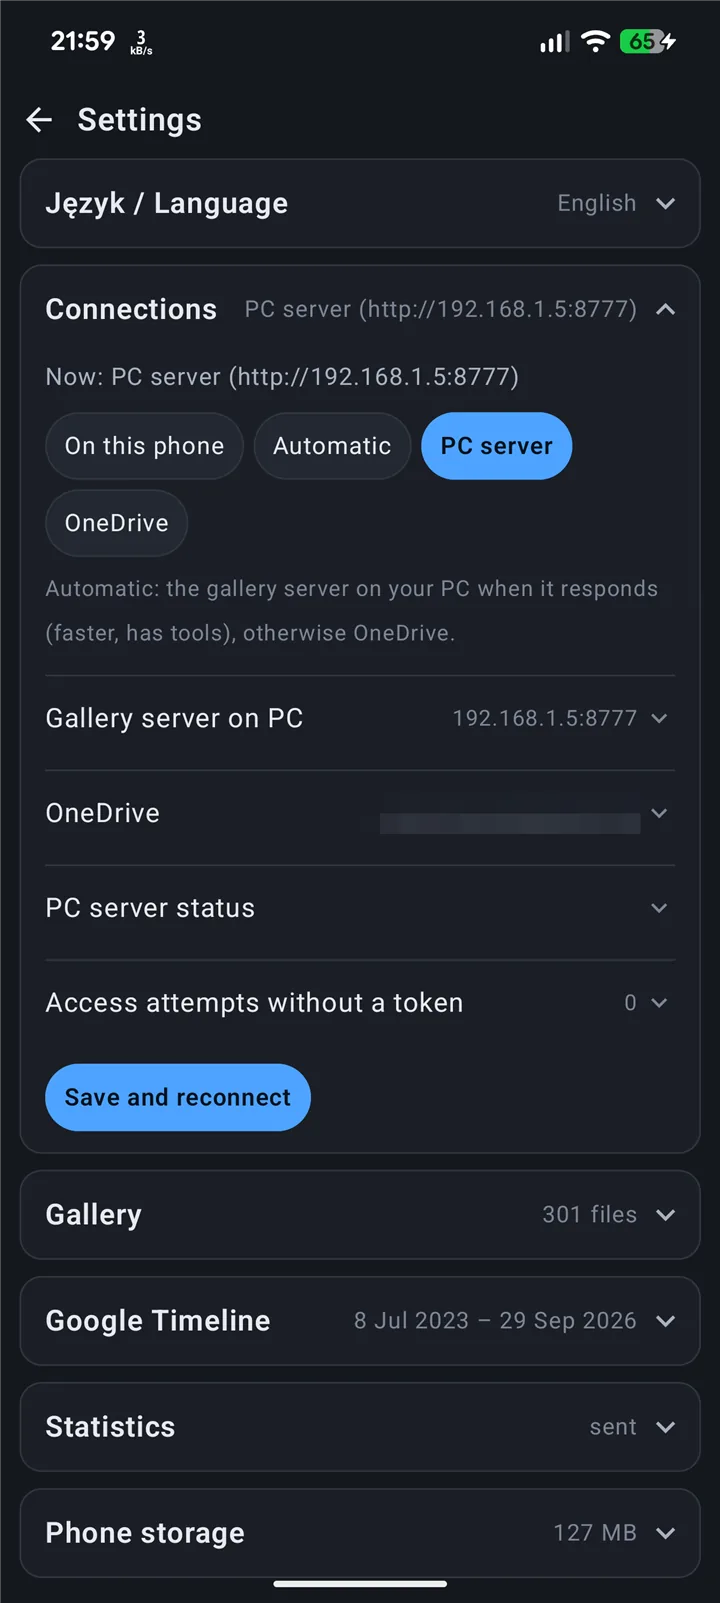
4Phone: Connections

Open the Connections group.

  1. Connections
Phone: Connections 1

5Phone: choose the PC server

Tap PC server and open Gallery server on PC. “Automatic” also works: it uses the PC when it responds and OneDrive otherwise.

  1. PC server
  2. Gallery server on PC
Phone: choose the PC server 1 2

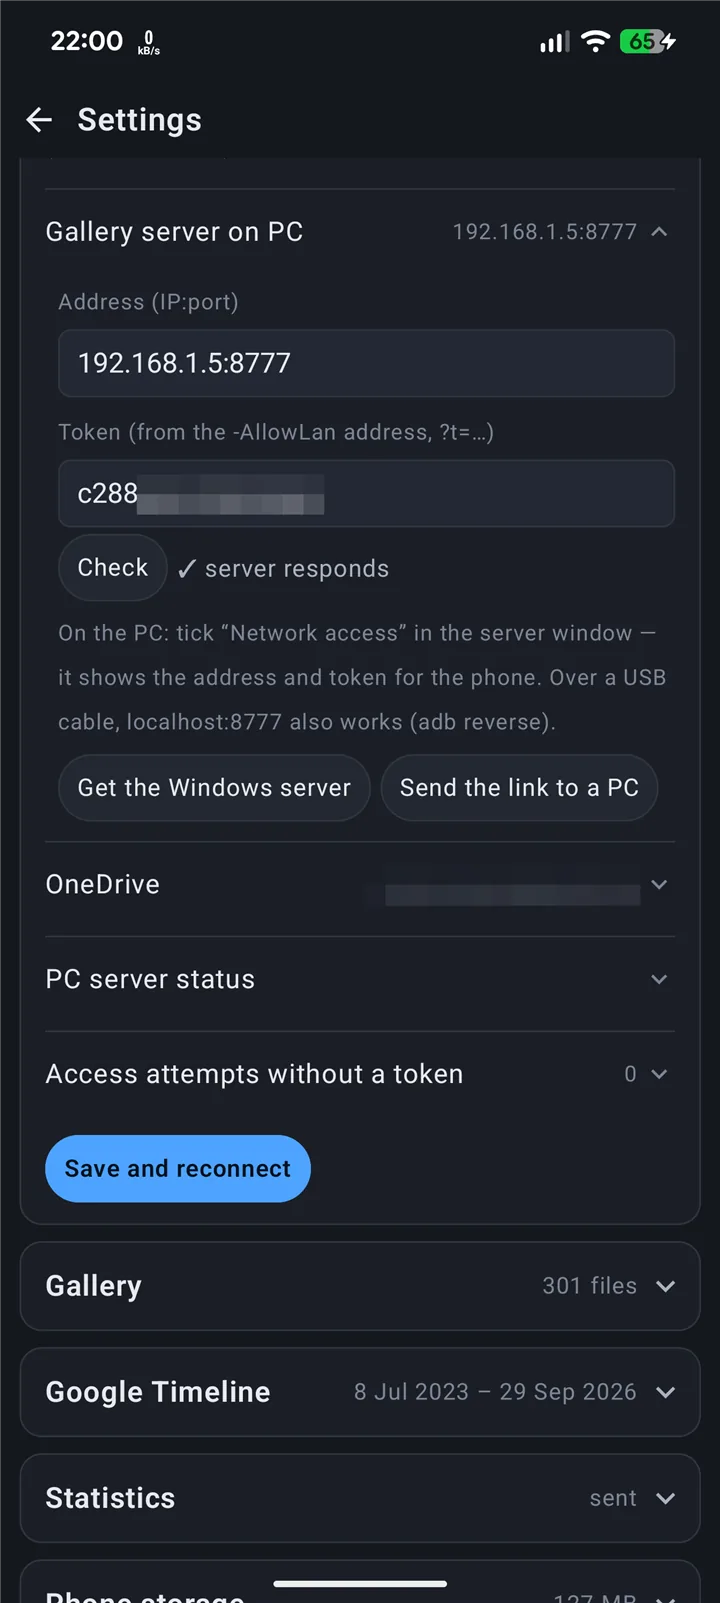
6Phone: address and token

Type the address from the server window without “http://” (e.g. 192.168.1.5:8777) and the whole token. Check should answer “✓ server responds”. Then tap Save and reconnect.

  1. Address (IP:port)
  2. Token
  3. Check
  4. Save and reconnect
Phone: address and token 1 2 3 4

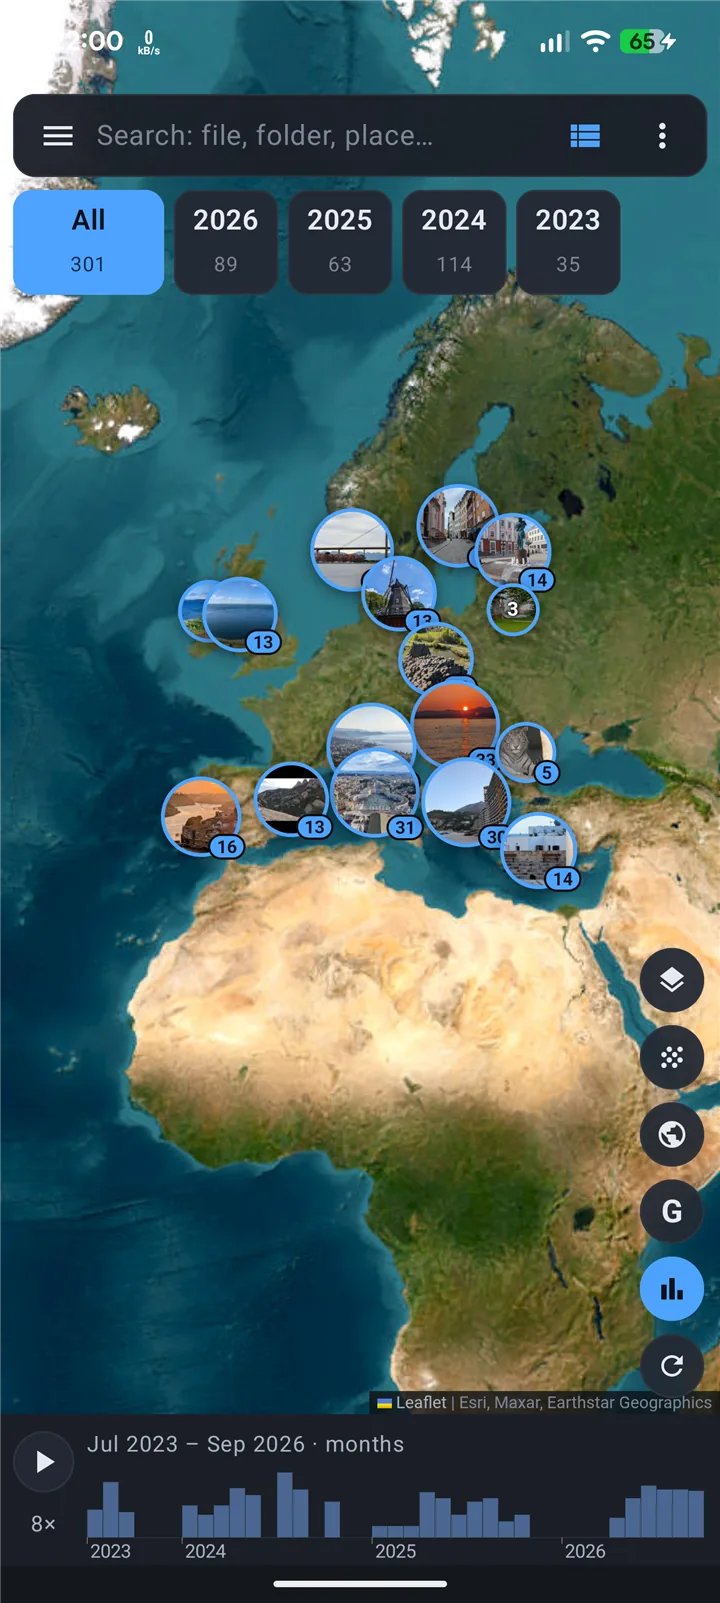
7Done

The map and the year bar now show the library from the PC. The phone and the PC must be on the same network. “✗ no response”: check that the server is running, network access is on and the address is the first one from the window.

  1. Files from the PC
Done 1

Connect the phone to OneDrive

With the library in OneDrive the phone can browse it while the PC is off. The phone reads the index and thumbnails that the PC server saved in the data folder, so the library must first be indexed once by the PC server (its data folder inside the library — the default in the installer).

1Open the settings

Tap ⋮ in the top bar → Settings → Connections.

  1. Menu ⋮
  2. Settings
Open the settings 1 2

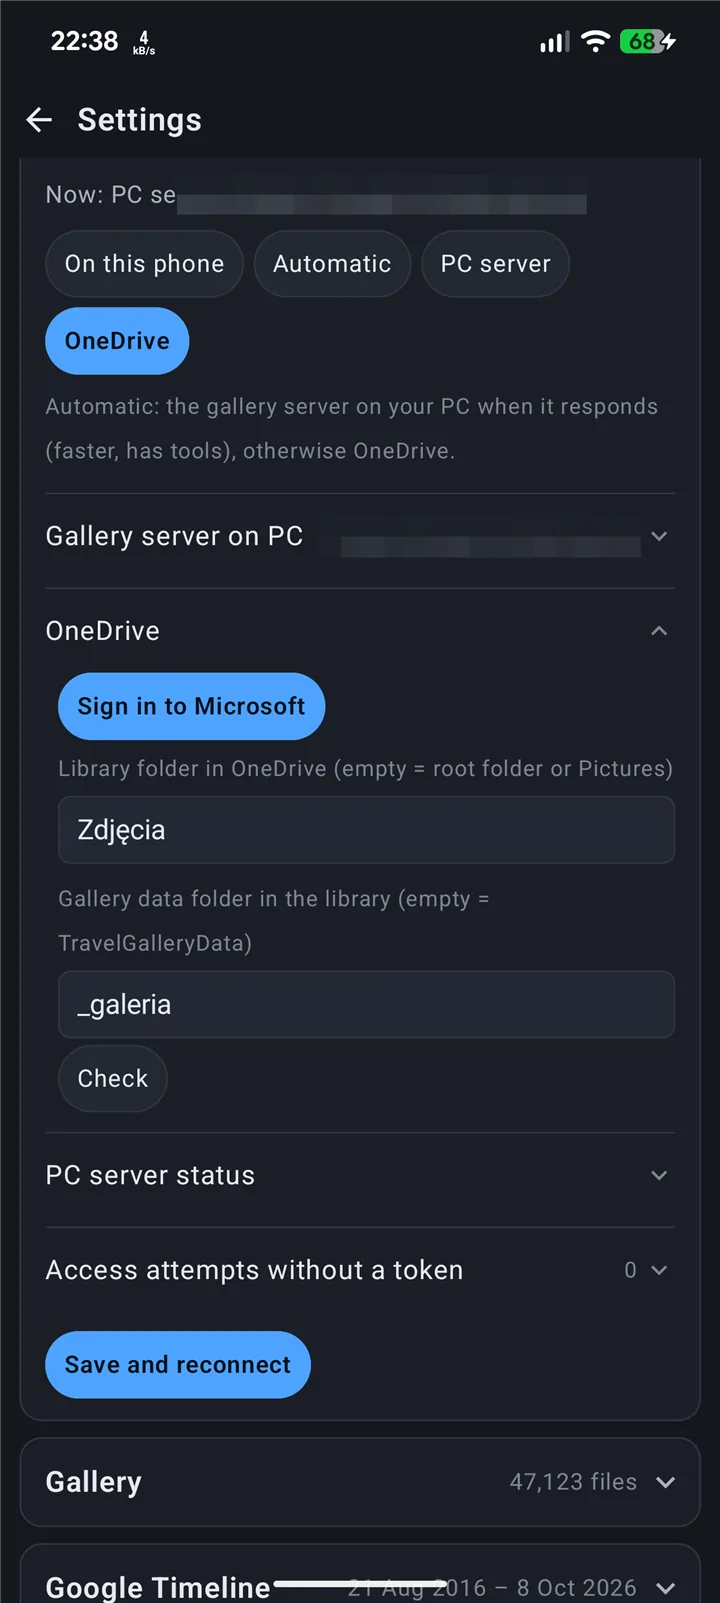
2Choose OneDrive and sign in

Tap OneDrive, open the OneDrive section and tap Sign in to Microsoft. You sign in with your own Microsoft account on Microsoft’s page — the app never sees your password and gets access only to your OneDrive.

  1. OneDrive
  2. Sign in to Microsoft
Choose OneDrive and sign in 1 2

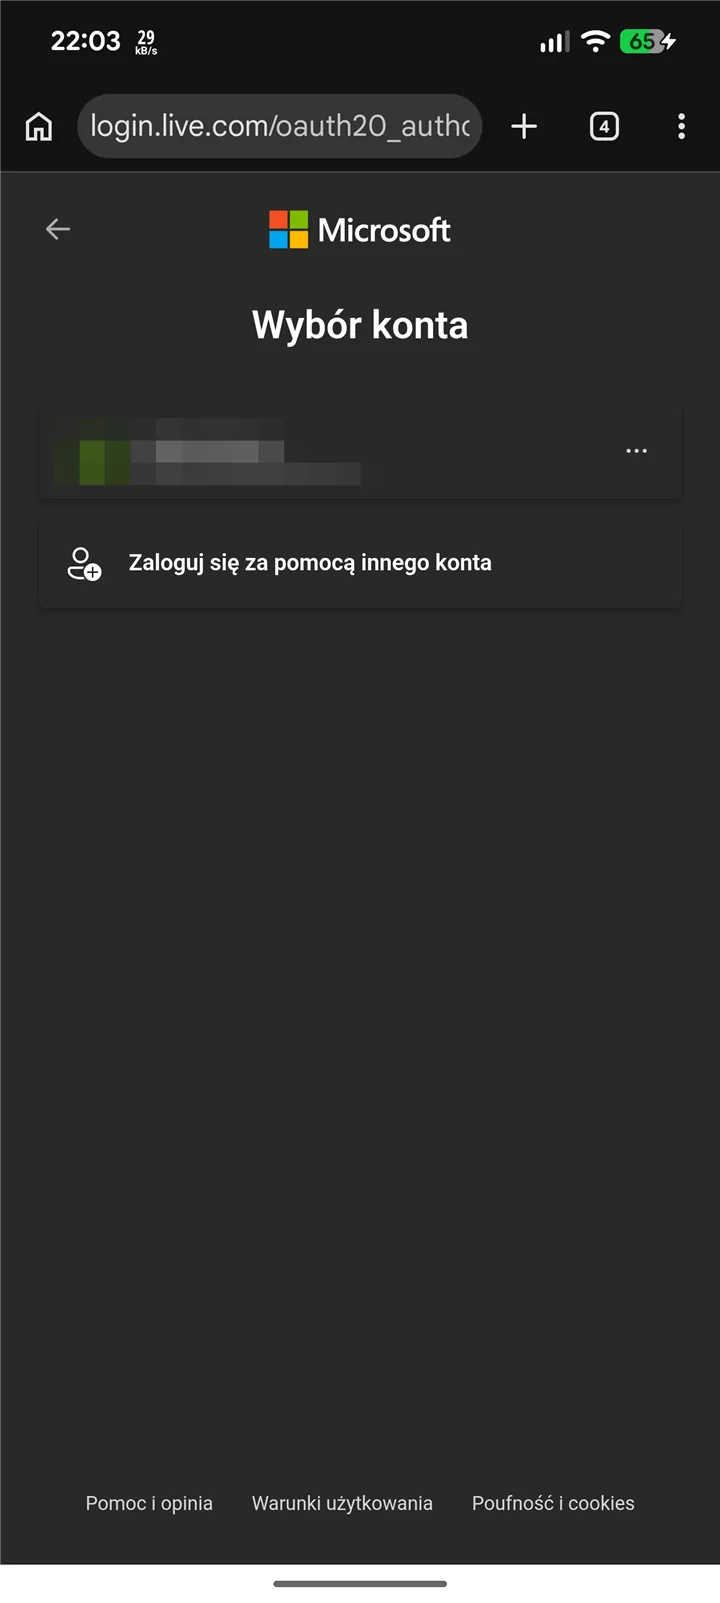
3Microsoft: choose the account

The Microsoft sign-in page opens in the browser. Choose the account with your OneDrive (or sign in).

  1. Your Microsoft account
Microsoft: choose the account 1

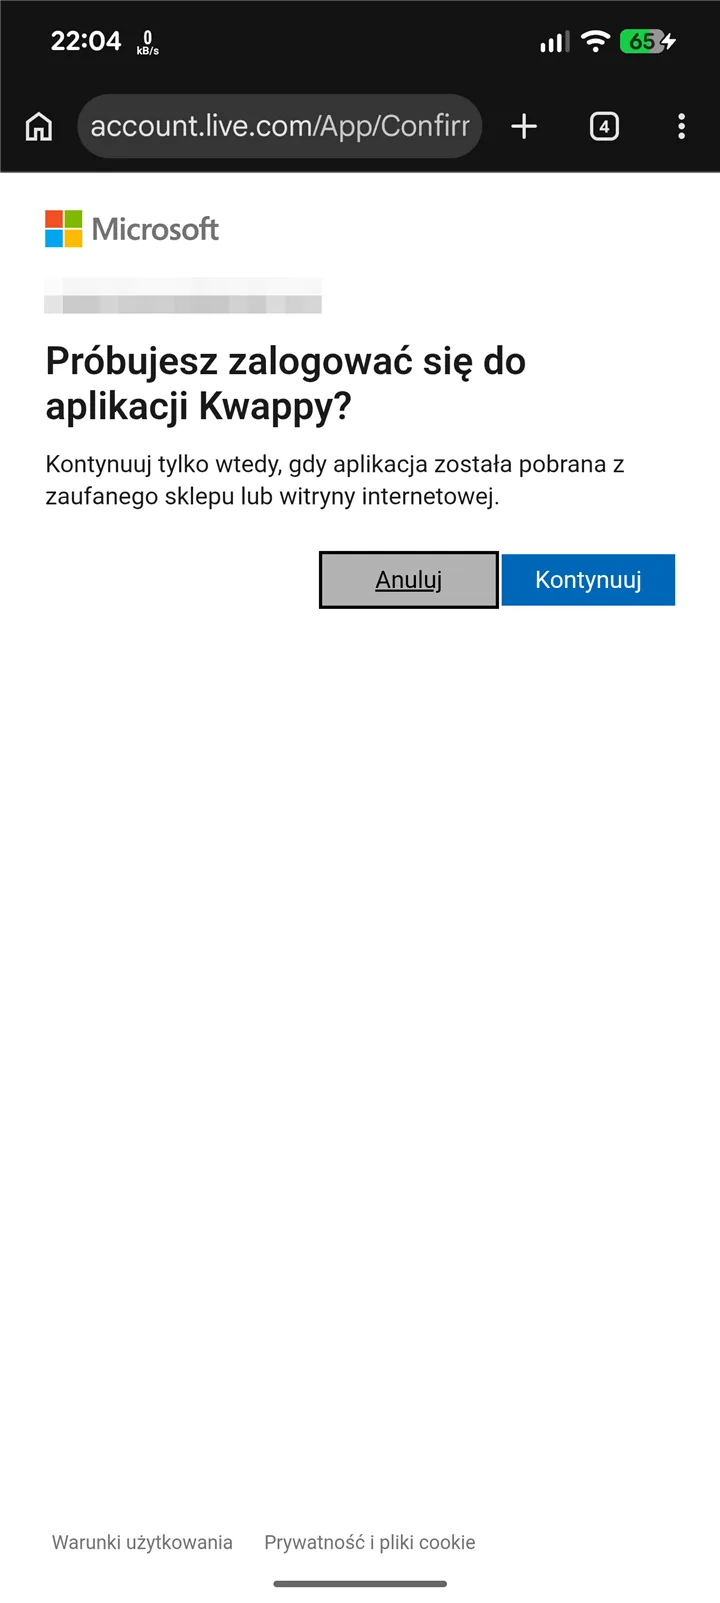
4Microsoft: confirm

Confirm with Continue. The browser hands the sign-in back to Travel Gallery.

  1. Continue
Microsoft: confirm 1

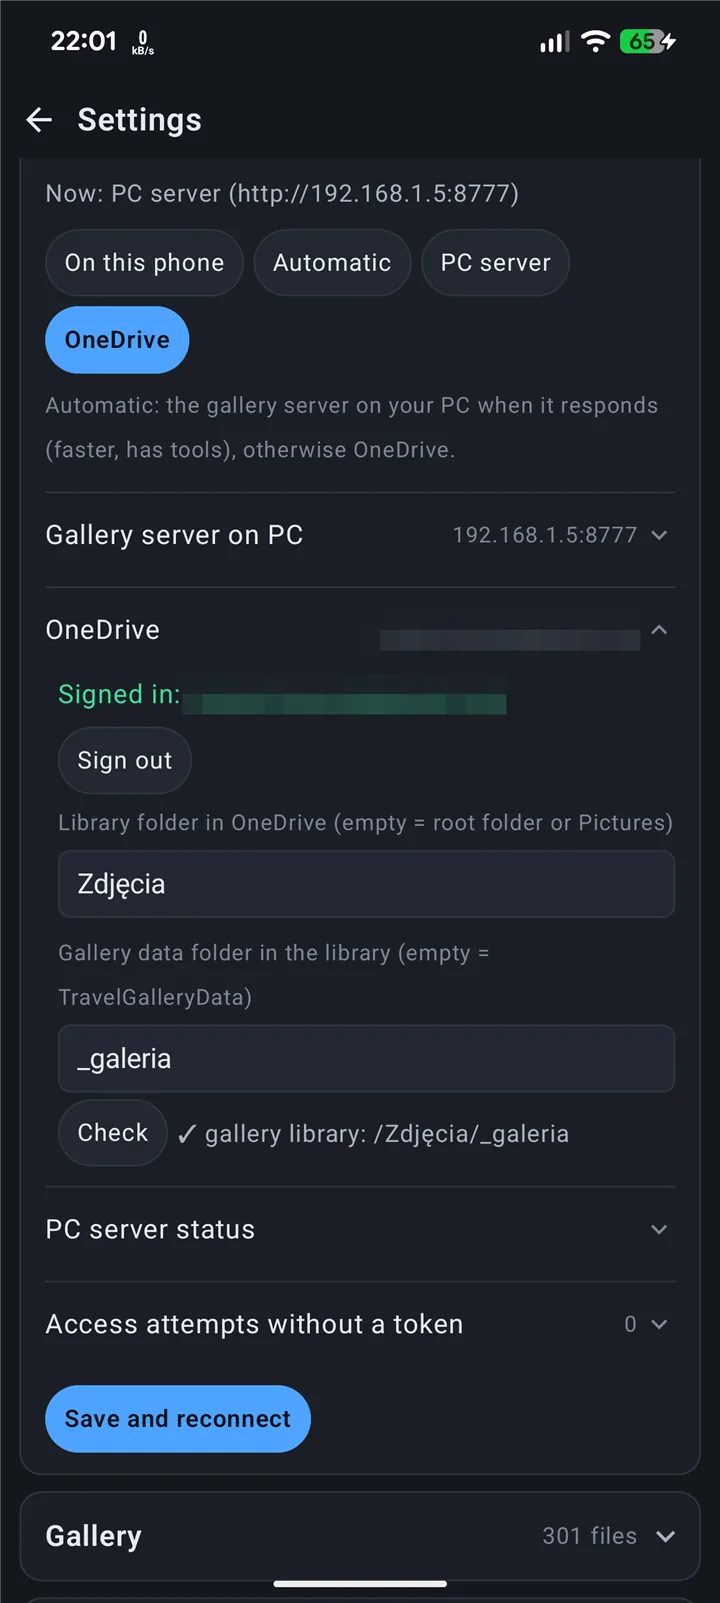
5Library folder, check and save

Enter the library folder in OneDrive (empty = the root folder or Pictures) and the name of the gallery data folder in it (empty = TravelGalleryData). Check shows the data folder it found. Tap Save and reconnect.

  1. Library folder in OneDrive
  2. Gallery data folder
  3. Check
  4. Save and reconnect
Library folder, check and save 1 2 3 4

Google Timeline: export on Android and view it on a map

Your Google Timeline (location history) is kept on the phone. Export it to a file and add it to Travel Gallery: the map shows your routes and stops, trip movies can follow the real route, and photos without GPS can get a place. Premium feature.

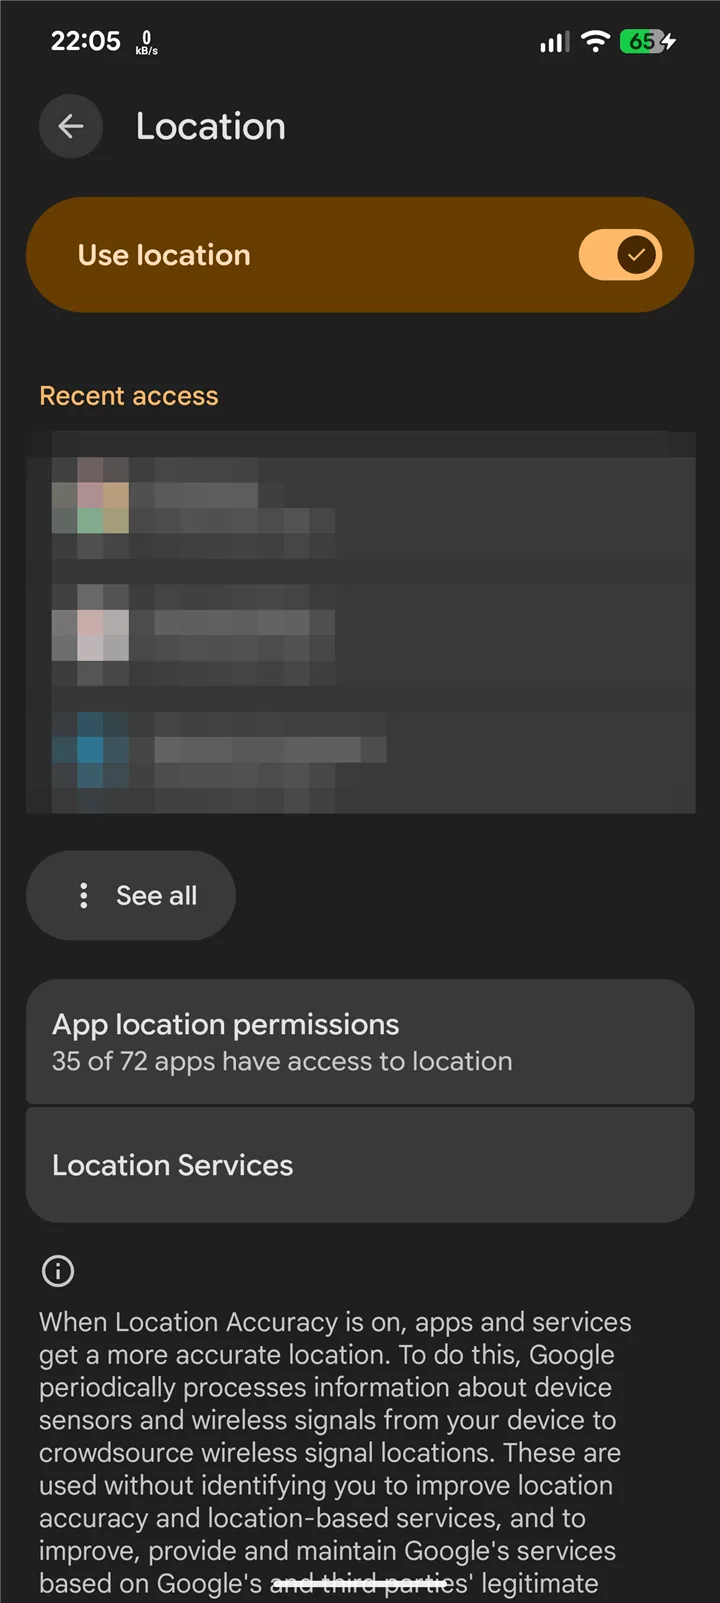
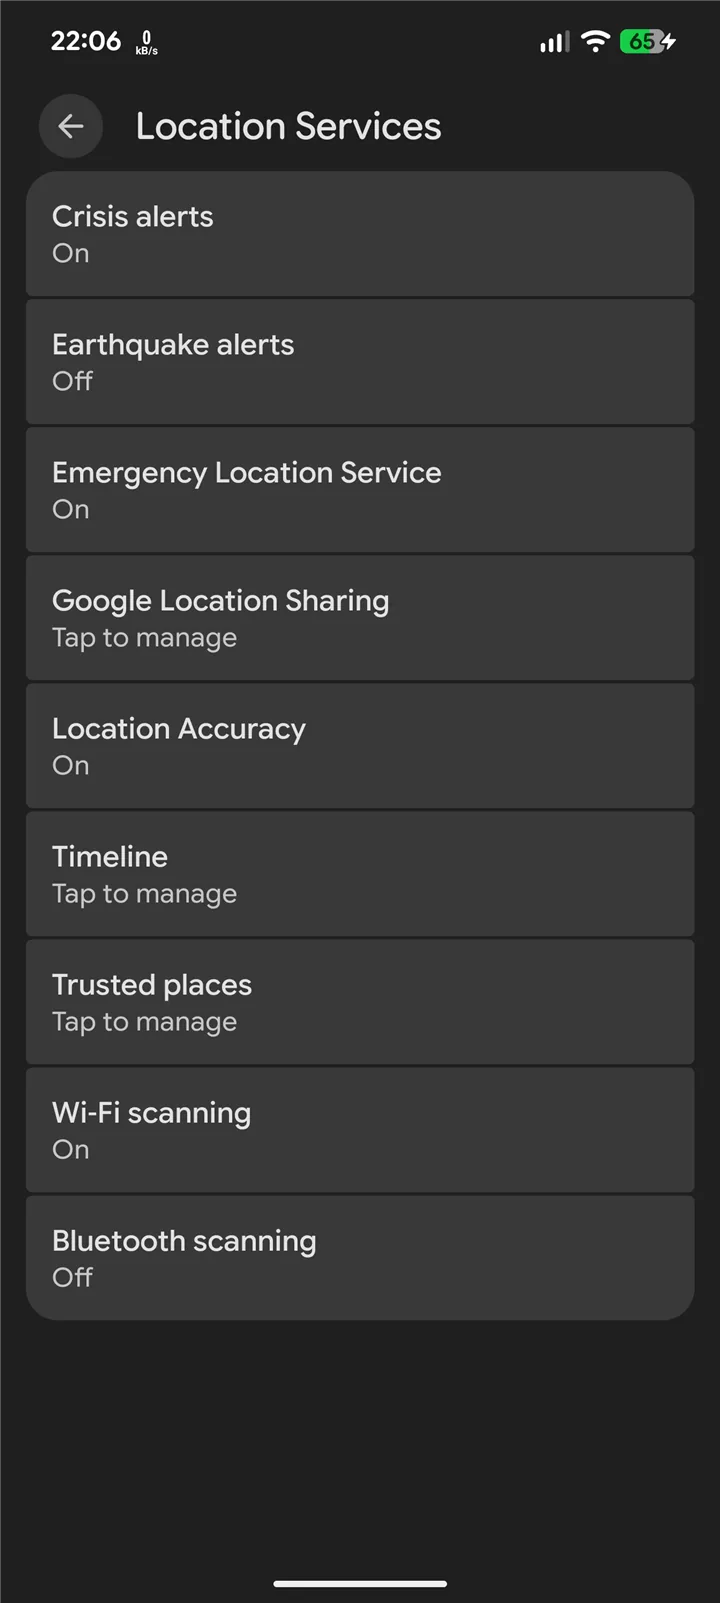
1Android: Settings → Location

Open the phone’s Settings → Location and tap Location Services. (Names can differ slightly between phone makers.)

  1. Location Services
Android: Settings → Location 1

2Timeline

Tap Timeline.

  1. Timeline
Timeline 1

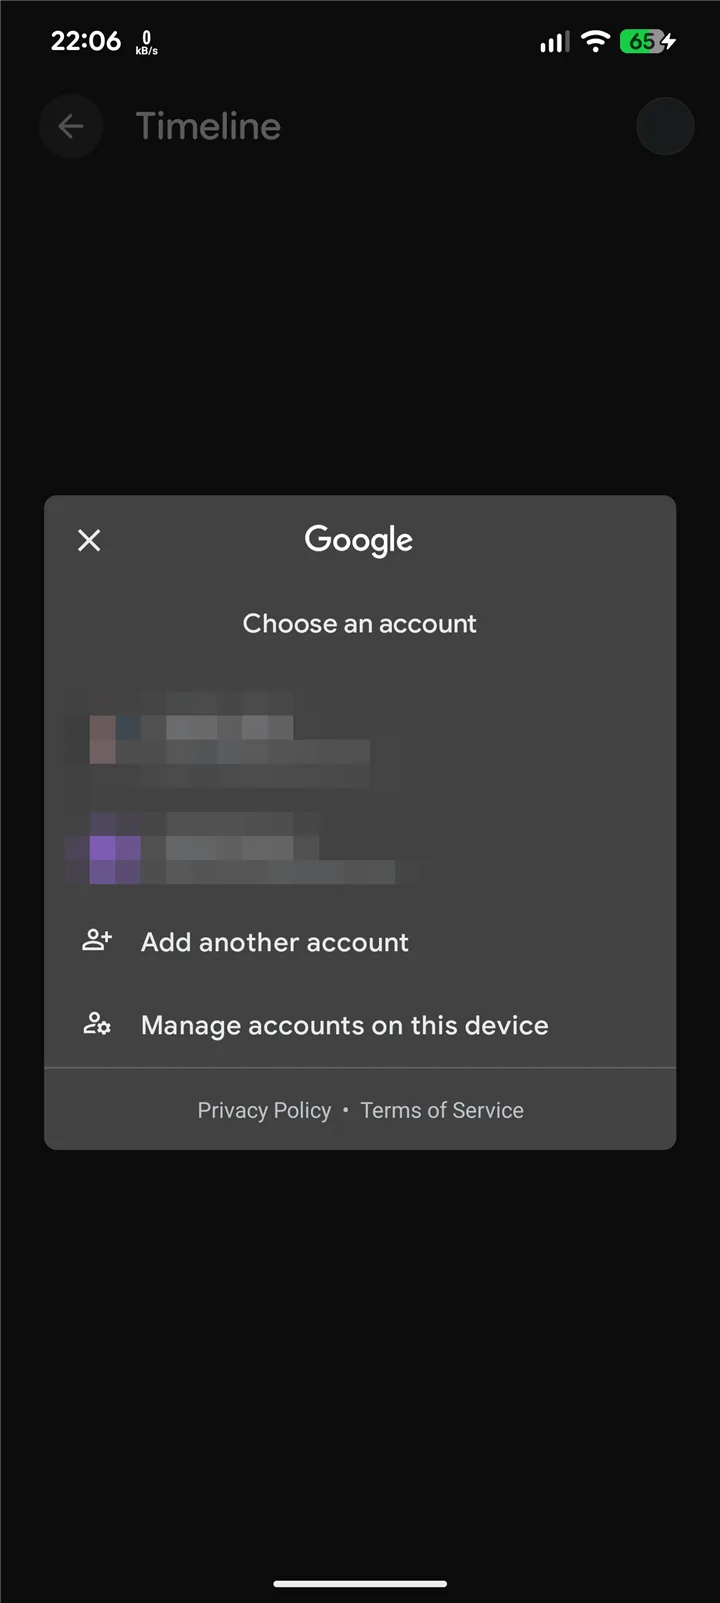
3Choose the Google account

With several Google accounts on the phone, choose the one whose timeline you want.

  1. Your Google account
Choose the Google account 1

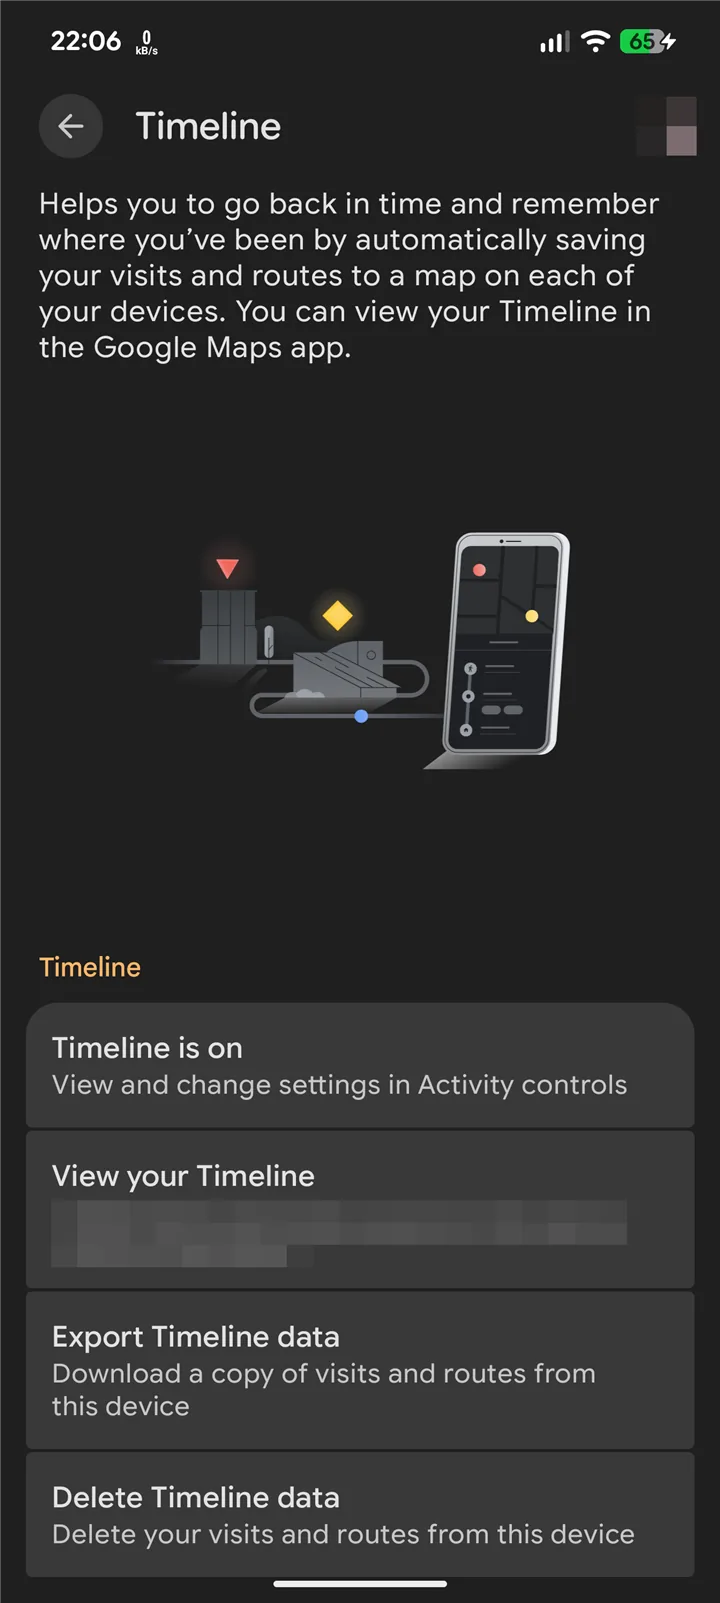
4Export Timeline data

Tap Export Timeline data.

  1. Export Timeline data
Export Timeline data 1

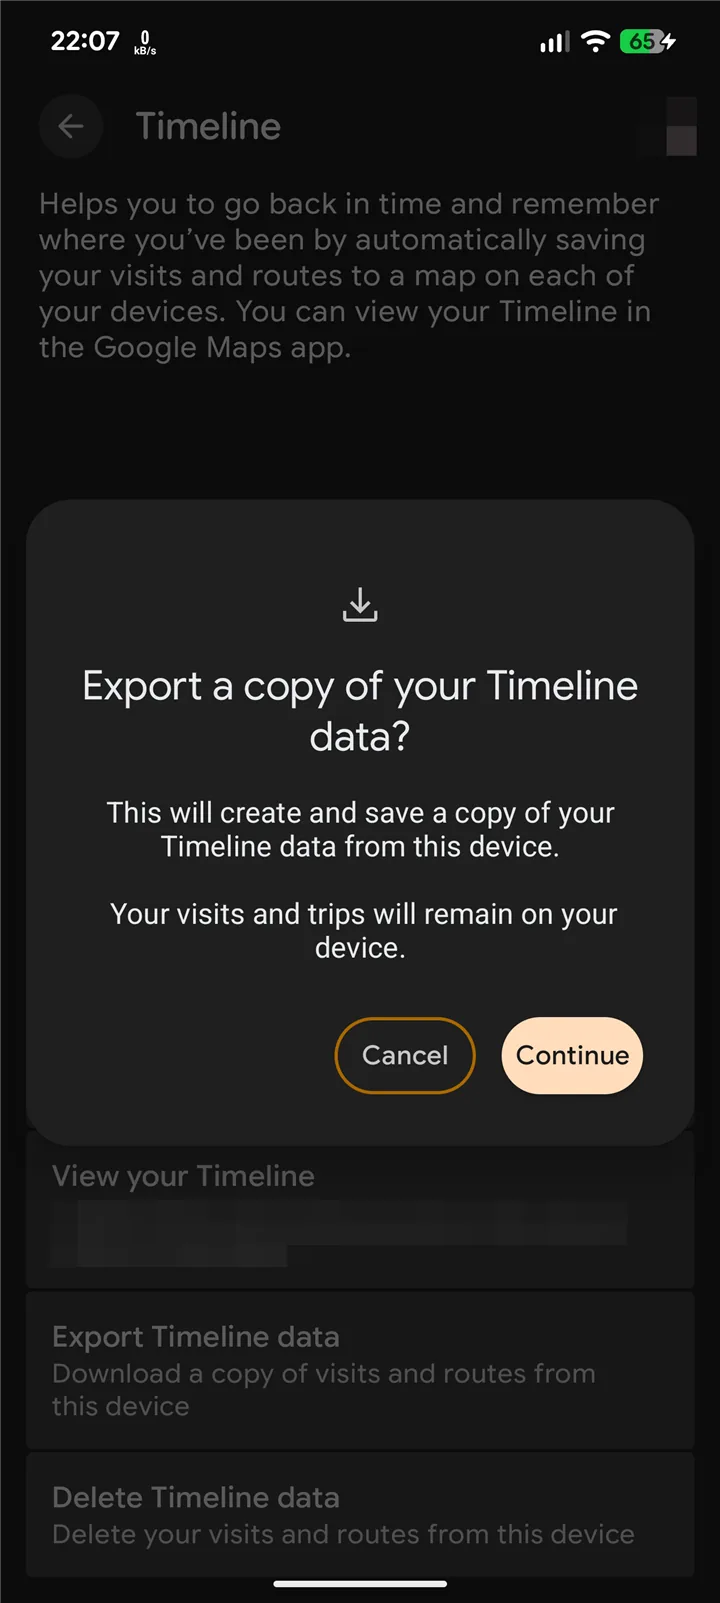
5Confirm and save the file

Tap Continue, confirm with your fingerprint or PIN and save the file (Timeline.json), e.g. in Downloads. The file contains your whole location history — keep it private.

  1. Continue
Confirm and save the file 1

6Travel Gallery: Settings → Google Timeline

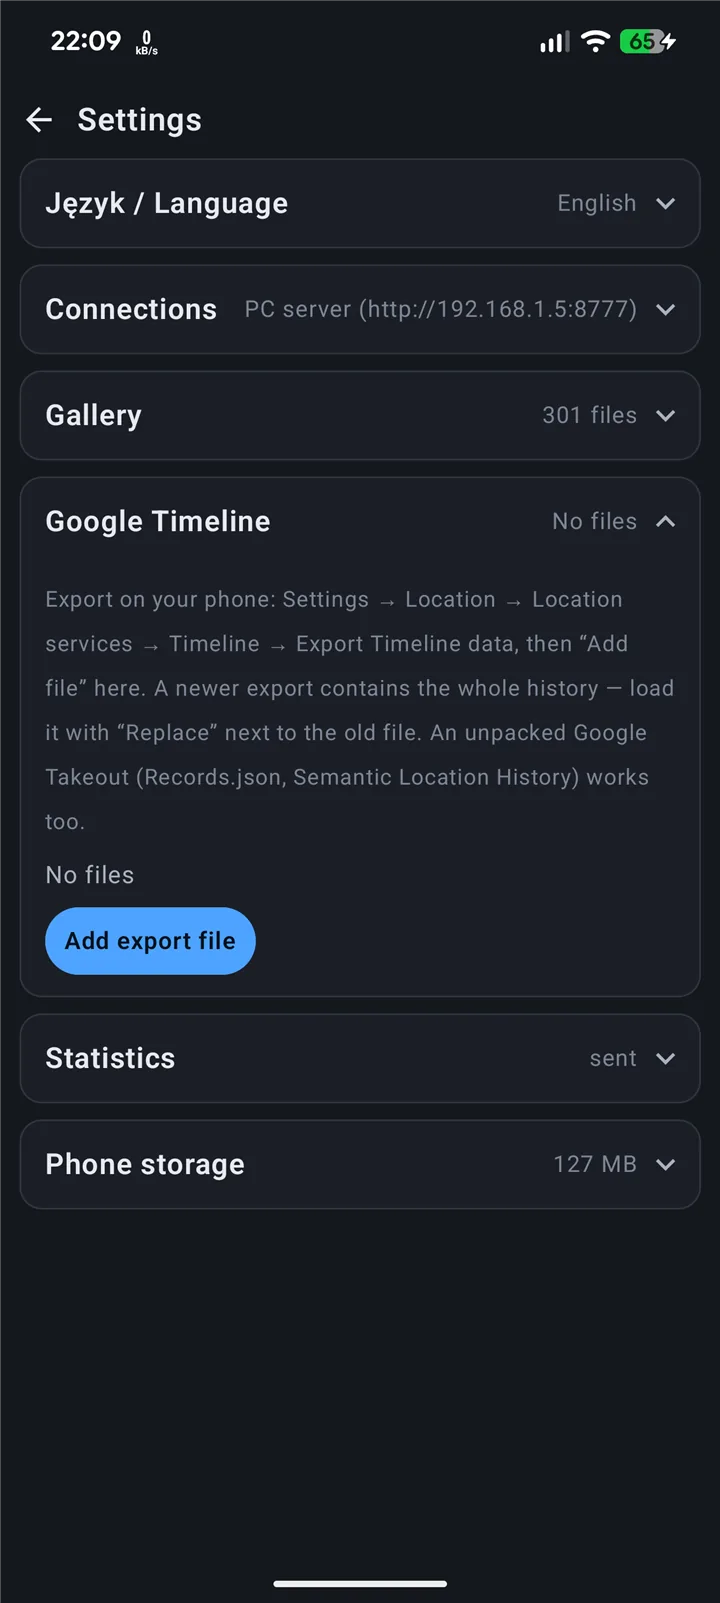
In Travel Gallery tap ⋮ → Settings, open Google Timeline and tap Add export file.

  1. Google Timeline
  2. Add export file
Travel Gallery: Settings → Google Timeline 1 2

7Choose the exported file

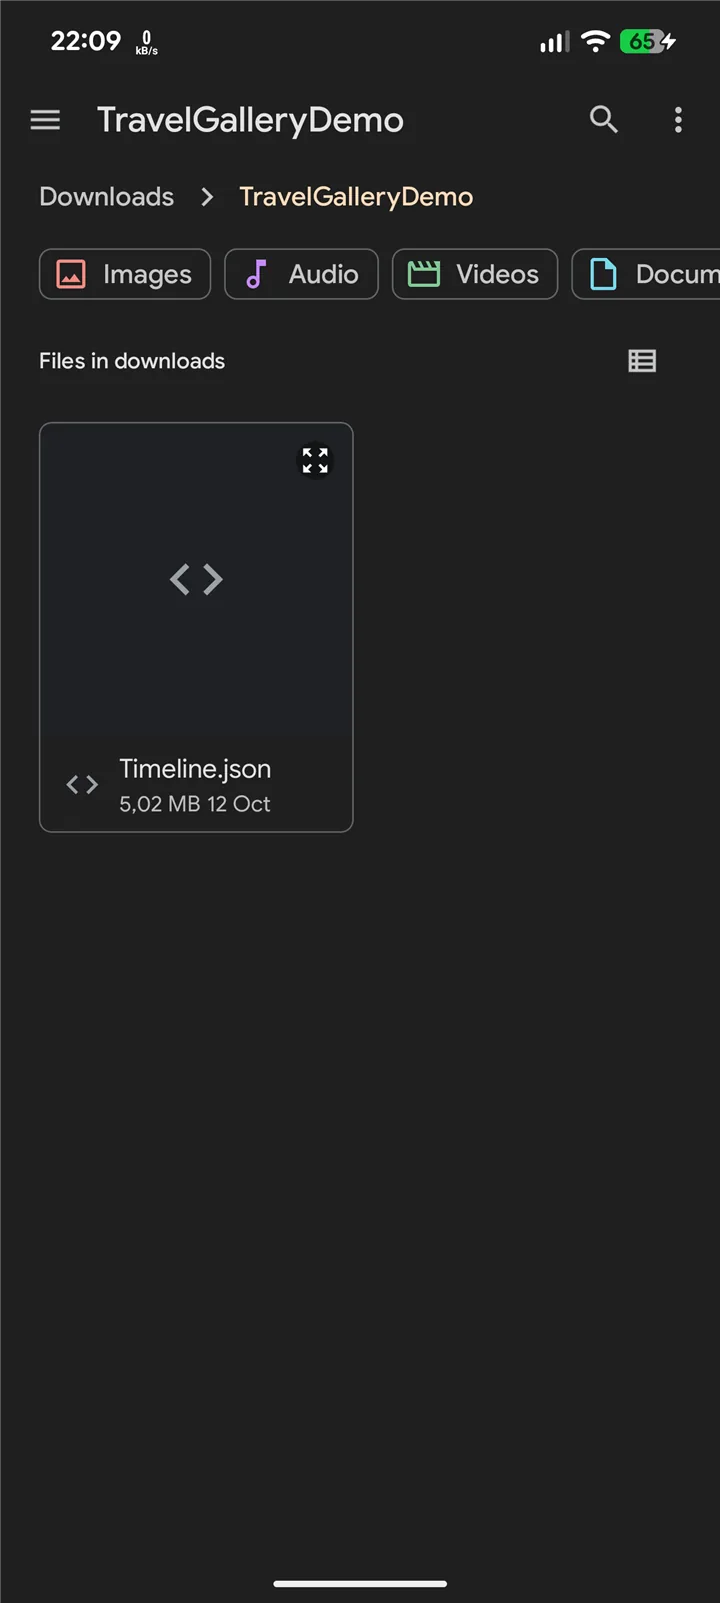
Pick the saved Timeline.json.

  1. Timeline.json
Choose the exported file 1

8The file is loaded

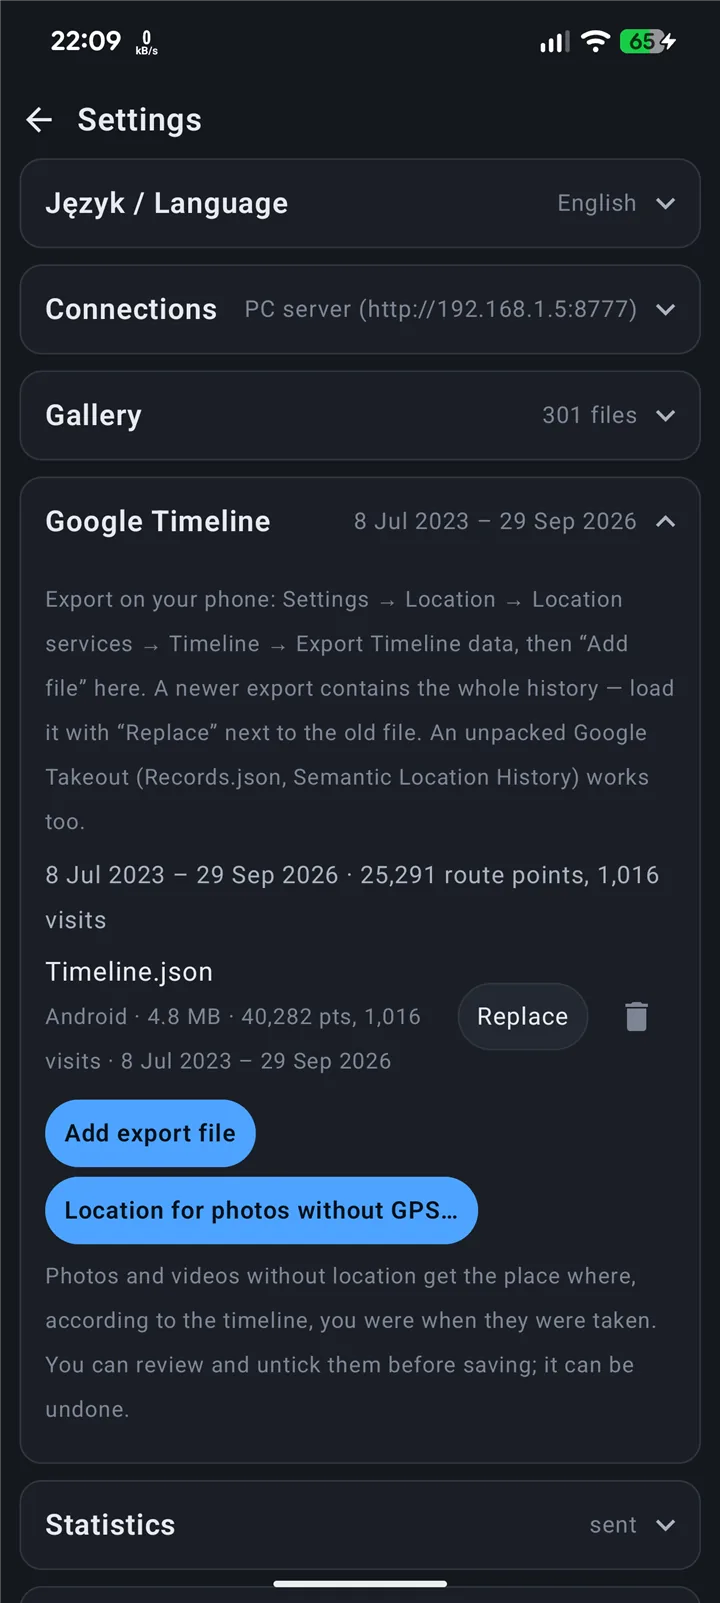
The list shows the file with the number of route points and visits. With the PC server the file goes to the server, which keeps it for all your devices. A newer export contains the whole history — load it with “Replace” next to the old file. Location for photos without GPS… places photos without coordinates where the timeline says you were when they were taken (you can review them before saving).

  1. Loaded file
  2. Location for photos without GPS…
The file is loaded 1 2

9Google layer on the map

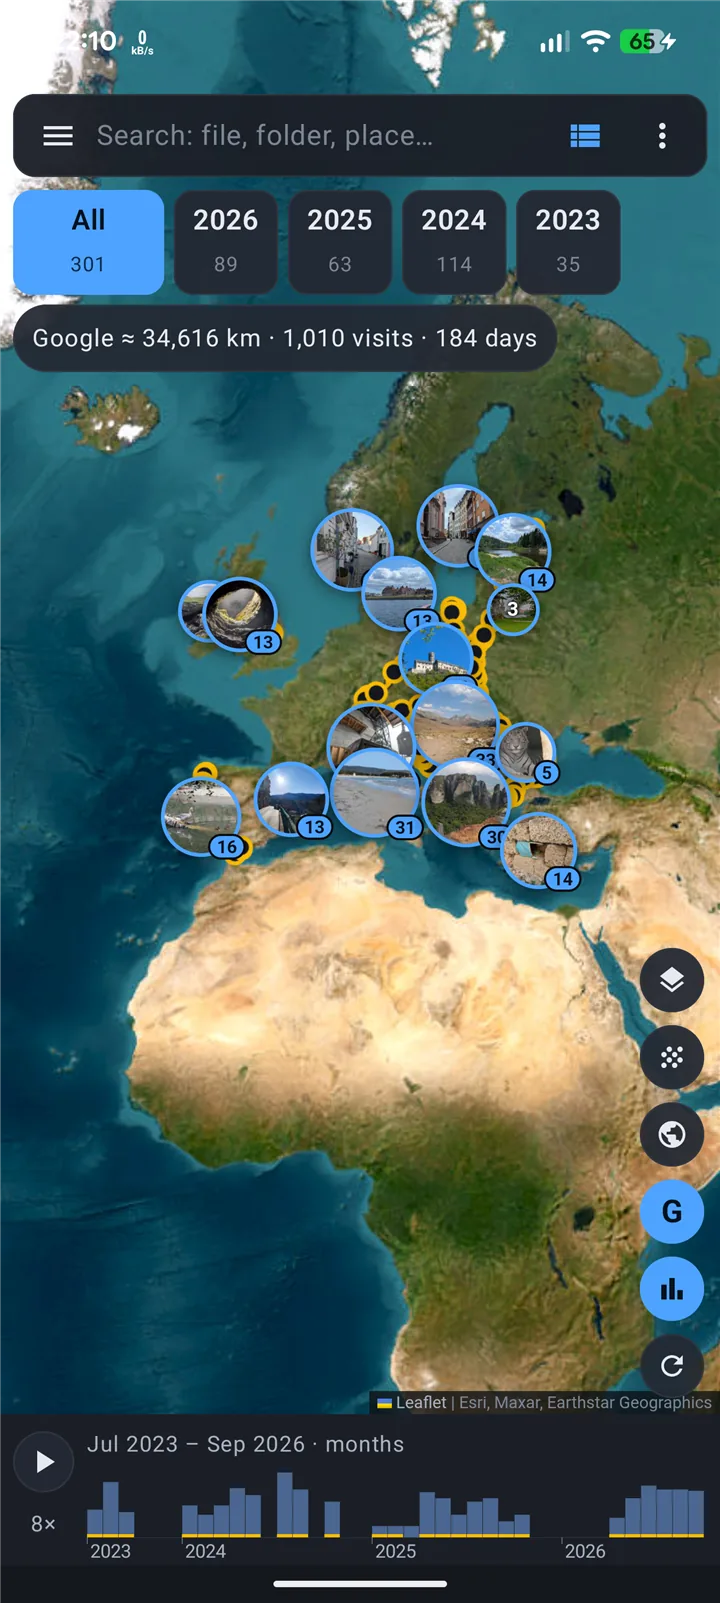
Back on the map, the G button turns the Google Timeline layer on: routes and stops, with the distance, number of visits and days of the selected period.

  1. Google layer
  2. Distance, visits, days
Google layer on the map 1 2